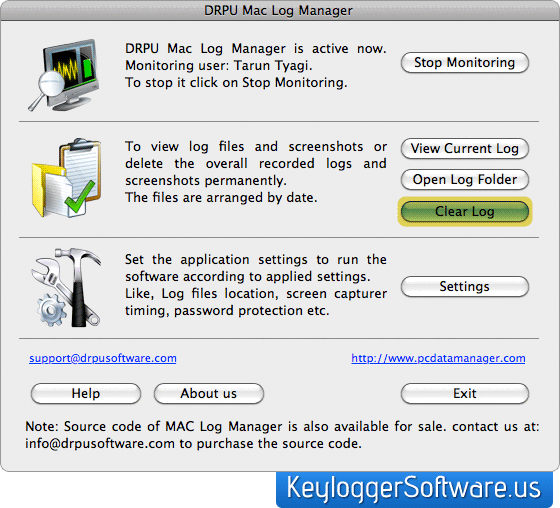
Step 2: Set the application setting to run the software according to applied settings like Log Files location, screen capturer, timings, password protection etc. On clicking the “Settings“ button the following window will be displayed.
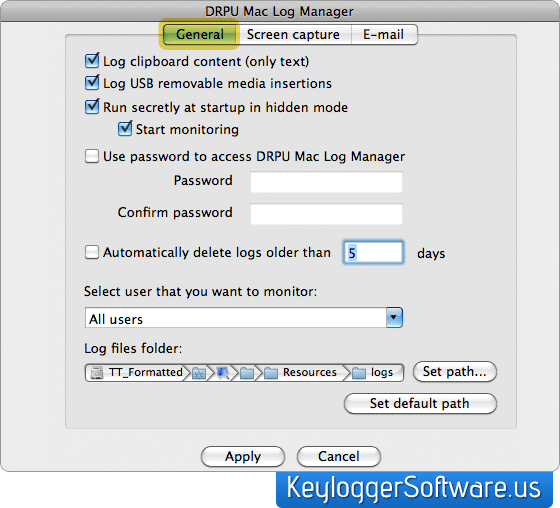
- General Settings – It includes following options
- Log clipboard content (only text): Select the option to log text clipboard content only.
- Log USB removable media insertions: Select the option to Log USB removable media insertion and removable activities on the PC.
- Run secretly at startup in hidden mode: Select the option to run the software secretly at startup in hidden mode, similarly select Start monitoring option to start the monitoring process.
- Use password to access DRPU Mac Log Manager: Select the option and enter password (in the Password text box) and type it again to confirm typed password (in the Confirm password text box).
- Automatically delete logs older than set days: Select the option and set the days to automatically delete older logs.
- Select user that you want to monitor: Select the user that you want to monitor. It can be All users, Guest user or any selected user.
- Log files folder: Set the path where you want to save log files folder. For doing so, press the Set path button and set the path where you want to save log files folder. Press Set default path if you want to save log file folder at default path.
Click here to View Screen Capture Settings for Mac spy software:
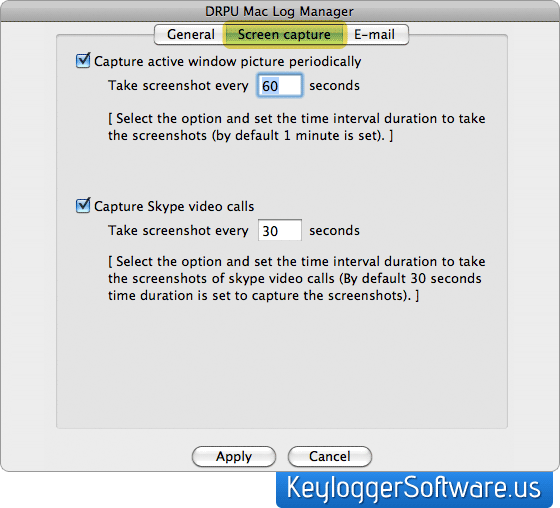
Above screenshot includes following options:
- Capture active windows picture periodically: Select the option and set the time interval duration to take the screenshots (by default 1 minute is set).
- Capture Skype video calls: Select the Capture Skype video calls option and set the time interval duration to take the screenshots of skype video calls (By default 30 seconds time duration is set to capture the screenshots).
E-mail Settings – It includes following options:
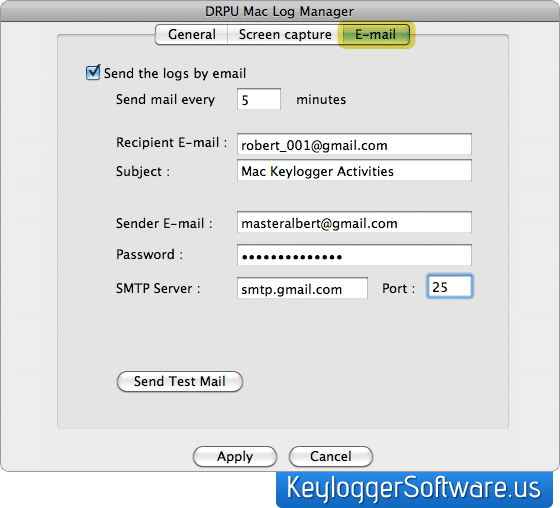
- Send the logs by email: Select the Send the logs by email option and set the time interval duration to send html log recorded data by e-mail.
- Recipient E-mail: Specify your email address here on which you want to receive activity logs automatically sent by PC Data Manager.
- Subject: Specify the subject of email sent by MAC Log Manager containing activity Logs as attachment.
- Sender E-mail: Specify the email address here that you want MAC Log Manager to use for sending the activity logs as attachment.
- Password: Specify the password of your Sender email address here.
- SMTP Server: Specify the SMTP server (outgoing server) address here. SMTP server (outgoing server) address is required for sending emails of activity logs.
- Port: Specify the SMTP port address of your email server here. For example SMTP Port for Gmail should be 587. Software provides facility to send test email by using 'Send Test Mail' button so that you can get the confirmation that e-mail settings are working properly.
Note – Click on Apply button to apply the General , Screen capture and E-mail settings. You should have sufficient admin privileges to apply following settings.
Step 3 for Mac monitoring software:Press “View Current Log” Button to view log files and screenshots or delete the entire recorded logs and screenshots. After clicking the “View Current Log” the following screen will be appear:

Step 4 for keylogger mac os x software: Click on the “Open Log Folder“ to view entire recorded activities performed by the users. On Clicking the “Open Log Folder” the will be displayed.
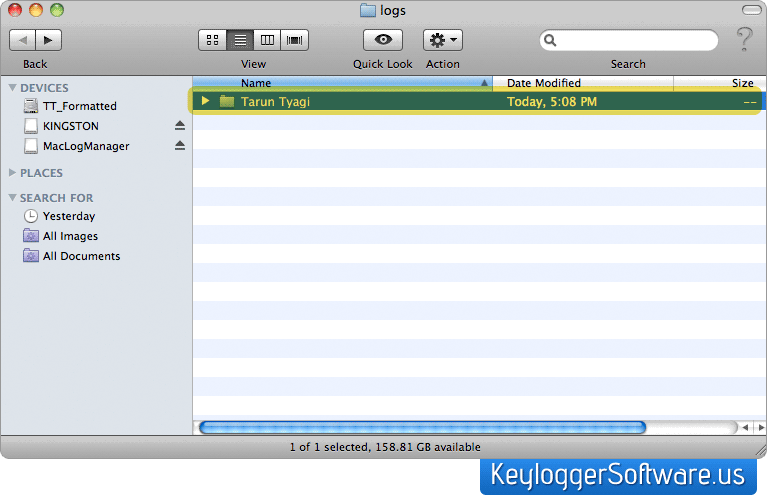
Step 5 for mac monitoring software: Click on the click “Clear Log” button to clear all user activities records.
|